Lock Down Your iPhone – 15 Important Security Settings
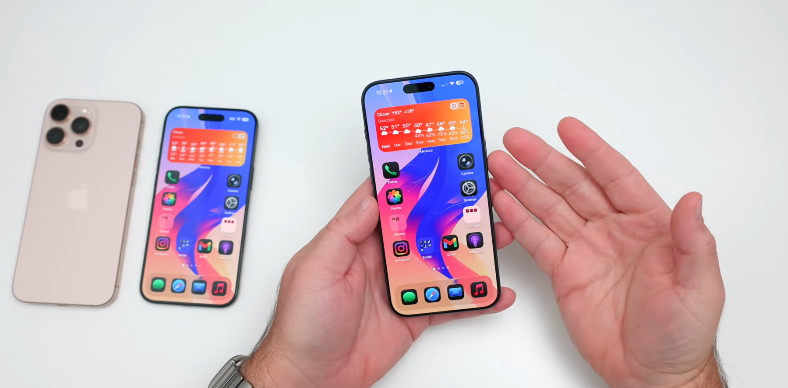
Table of Contents
iPhone Security Settings:
Hi everyone, there are quite a few settings you should review or be aware of to help you secure your iPhone. We wanted to show you not only your lock screen settings but also location and tracking settings, app permissions, device protection, and more. So, let’s get started with what you see first on your iPhone, the lock screen. We’ll start simple, then move on to more advanced settings.
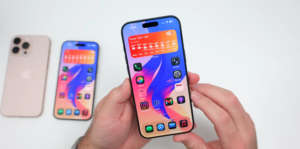
The Lock Screen:
The first thing is your lock screen. Maybe you have your
Lock screen setup, and you don’t want anyone to be able to access your phone. Please adjust how quickly it locks. Go down to your settings. Go to display and brightness. Then scroll down to autolock. We only put it on when we’re recording a video like this, so it doesn’t lock during the video. But we typically use 30 seconds. Personally, we wouldn’t go over 1 minute so that it locks. If you forget this, you want it to lock on its own. So if you leave your phone somewhere, you walk away. It’s secure. So something simple, but definitely worth checking.
Lock-down Your iPhone quickly:
Also, there’s something you can do if you’re on your lock screen. And maybe you don’t want someone to be able to gain access to your phone. You can lock it down quickly. Hold the side button and one of the two volume buttons here. So, just hold them here until you actually see this screen where it says slide to power off. This now forces someone, if they tap cancel or try to unlock your phone, to place your passcode here. So, once you have that, it will now force the passcode have that, it will now force the pass-code.
And also, there’s another setting you want to consider. So if you put in the wrong pass-code, for example, you can force your phone to erase on its own. So if we just put in this one, if we do this 10 times, we can actually have the phone erase itself so that no one can gain access to our personal data. So let’s go ahead and log in. So, to go along with auto-lock, if someone grabs your phone, you want to set this up so that it could auto-erase. Now, of course, if you don’t know your password, you forget it a lot.
This could be dangerous because you may erase your phone. But as long as you have it backed up, you’re good to go there. But again, if we go into our settings, go to Face ID and pass-code, and under Face ID and pass-code, if we scroll all the way to the bottom, you’ll see an option for erase data. It says to erase all data on this iPhone after 10 failed passcode attempts. If you enable this, it will erase after someone tries to gain access to your phone 10 times.
So, if we turn this on, it will warn you one more time. Tap enable, and now it’s secure. Now, just keep in mind that if you don’t know your passcode, you forget it often, it could wipe your phone.
Stop Showing Everything:
Now, if we scroll up just a little bit again under Face ID and passcode, the final thing I’d consider for your lock screen has to do with what’s allowed when your phone is locked. You’ll see that these are all the options that we have enabled by default. It says allow access when locked, today view and search, notification center, control center, locked screen widgets, live activities, Siri, reply with iMessage or messages, home control, wallet, return missed calls, and workout health data.
Typically, we would recommend at least turning off the control center. Maybe you want to leave lock screen widgets enabled. But if we turn all of these off, it will lock down our phone and make it more secure. Now, we prefer to use Siri, but if we turn most of these off here, we’ll go ahead and turn all of these off. When we go to our lock screen here, and the phone is locked, we no longer have access even to our widgets down at the bottom. If we pick our phone up, go ahead and tap on it, it unlocks. Our widgets then show up. So, this is something we would select based on your use case and how secure you want your phone.
Secure Your Personal Data:
Now, locking down your phone is great, but when it comes to your personal data, it can be spread everywhere online. But you can lock it down with today’s Incogn. When your personal data is exposed, it can be found on search engines, shady directories, and multiple websites, leading to identity theft and scams. Not only could your data be exposed, but your email, phone number, address, social security number, and relatives’ information are being bought and sold by bad actors.
Incogn tracks down and removes your personal data automatically from online directories, commercial databases, people’s search sites, and many other sites as well that might have your data. Incogn also has a custom removal tool that can take down just about everything. Send incogn link, and a dedicated privacy expert will help you remove your data. You simply create an account with Incogn, authorize them to remove data for you, and then you’ll start seeing entries found online about you with requests to remove your data within minutes. When the data is removed, they let you know.
We’ve used Incogn for over a year now, and they’ve removed 1,151 entries for me. They’ve sent 1,247. There are 120 scheduled and 96 in progress. This has saved us 863 hours and 15 minutes. This is something we definitely couldn’t have done on our own, and it saves us tons of time and removes our personal data online. Be sure to check them out to secure your data.
Secure Your Apps:
Now, the next thing you may or may not be familiar with is that you can lock your apps that have personal data in them. For example, if you want to lock photos, press and hold, and you can have it require Face ID. If we do that, it says this app will require Face ID or your passcode to open or show content in other apps.
App content will not appear in notification previews or spotlight. That’s because this is photos. So if you require Face ID, it will require it everywhere and lock down the app individually. This works through many apps. So if we go through, maybe we want the wallet app here, we can require Face ID. We can even do this on third-party apps as well. For this app, for example, requires Face ID. We can lock any app individually. So, if you want to do that, you can require a passcode for it, locking down that individual app.
Stop Apps Listening on iPhone:
The next thing we need to take a look at has to do with the overall apps and if they’re allowed to use your microphone and camera or access your photos. You can find this under settings, and then we’ll go down to privacy and security. And then if we scroll down again, you’ll see a whole section dedicated to the camera as well as the microphone. For example, if we go into the microphone, you can see all of the applications that have access to our microphone. If we don’t want Final Cut Pro to have access, we can turn it off.
The next thing we need to take a look at has to do with the overall apps and if they’re allowed to use your microphone and camera or access your photos. You can find this under settings, and then we’ll go down to privacy and security. And then if we scroll down again, you’ll see a whole section dedicated to the camera as well as the microphone. For example, if we go into the microphone, you can see all of the applications that have access to our microphone. If we don’t want Final Cut Pro to have access, we can turn it off.
The same is true with Facebook; maybe we’ll leave Facebook off, turn Instagram off, for example. Any application that’s a social media application that maybe you think is listening to you, this is where you can actually see if they have access to your microphone, where Apple actually locks the app out of accessing the microphone. So, take a look at that. Disable it if you want to or leave it enabled based on your use case. If we go back, you can see the same thing with the camera.
For example, some applications you’ll want to use the camera, others you won’t. For example, if we scroll down, this is actually a lawn mower. We don’t need a lawnmower to use the camera. So, we’ll turn that off. The same is true with maybe a few different apps here. If we scroll down, we don’t need Instagram to use our camera if we’re not posting. If we do, leave it on. The same is true for anything else, whether it’s a bank or anything else, such as TikTok, Tesla, or anything else that we have here.
So again, go through this one by one. Disable it if you don’t want to have access to that. The same is true with photos. So if we scroll up, you can see photos. Again, you’ll want to go through these one by one. If we go into photos, you’ll see specific applications may have full access. For example, we don’t necessarily want all of our applications to have full access to our photo library. So, if we scroll down, go into Snapchat, for example, we can give it full access, edit the selected photos, or change it to none, so they have no access whatsoever.
Now, again, within privacy and security, another thing we’ll want to consider is tracking. Apple can block applications from allowing apps to request to track. So, we’ll see that we have this turned off, meaning no application can track another application. If we turn this on, it will say allow apps to ask to track your activity. So, it’s a little bit confusing here, but if we disable this, no apps can talk to other apps, so they’re all turned off.
You could turn this on individually, but it says apps that have asked for permission to track your activity with an identifier will appear here. Tracking activity is blocked by apps that you’ve denied access to. So, we typically just leave it off. Now, apps can’t talk to one another. We don’t need them knowing what other apps are doing, so we leave it off altogether.
Secure Your Web Browser:
Safari does a pretty good job of blocking information and trackers between sites, and you can see some of that privacy information down here at the bottom. If we tap on our menu options, tap on our options again, you can even see a privacy report and other information. However, there’s one setting we would typically look for to enable. If we go into our settings, then we scroll down to apps, and then go to Safari. Within Safari, scroll all the way to the bottom, and you’ll see advanced. Within advanced, we have advanced tracking and fingerprinting protection.
This is something we would leave enabled. It may be off already or just for private browsing. We typically turn it on for all browsing. Basically, you can enable this to help keep your information as private as possible. It’s a privacy feature that blocks complex methods websites use to identify and follow you. This can follow you across websites. It combines URL cleaning and removes tracking codes with anti-fingerprinting, or makes it harder to get your device info. So, if you leave that on, it just keeps things a little bit more private.
Secure Your Location:
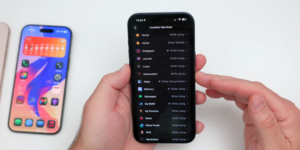
There are a couple of things we would recommend taking a look at and considering changing based on your overall use case. Now, we’ll see this little arrow here. This lets us know that something recently used our location. That’s okay if specific apps use that, but you want to be aware of what those are. That can be found under settings. Again, if we go down to privacy and security, this time under location services. Of course, you want to enable location services to use things such as find our navigation apps or just locating you for specific things.
If you don’t want any of that, you can turn it off, but that will turn off some specific features. So, the first thing is in order to see this little arrow here, so that we know that maybe locations were being used. Scroll to the bottom, and you’ll actually see under system services, where we scroll to the bottom again, we have a status bar icon. If that’s enabled, you’ll see a status here. It says, “Show the location services icon in the status bar when the services above request your location.” If you don’t want to know about that, you can leave it disabled, and you’ll never see it.
But if you do, it gives you a couple of different things here. A gray arrow indicates that an item has used your location in the last 24 hours. A purple arrow indicates that an item has recently used your location. So, it lets you know. If we scroll back up in system services, you’ll see all of the purple arrows of things that have actually been used recently.
Now, a lot of people recommend turning off significant locations and routes. However, we typically don’t turn that off as it’s used for navigation and suggestions. If you don’t care about any of that, you can disable it. However, Apple does specifically say on their website that optimizing battery charging will not work if this is off. However, some people have said it works anyway. But on Apple’s website, they actually say that if this is turned off, it won’t work when it comes to battery.
And if we go into significant locations and roots, we can show you that we have it on. At the top here, it says, “Allow your iPhone and other iCloud-connected devices to learn places significant to you, as well as routes you take often, to provide useful location-related information in maps, calendars, photos, and more. Your significant locations and roots are end-to-end encrypted and cannot be read by Apple. So, that’s why we leave it on.
You may not want to leave it on, but we find it useful for certain services we use elsewhere. But if you don’t need it, you can turn it off.” Also, on Apple’s battery website, like we mentioned before, and on Apple’s website, it says that if optimized battery charging doesn’t activate. If we scroll down here, you’ll see the feature doesn’t engage when your charging habits are more variable when you travel, or you charge for short periods of time. Because of this, some location settings must be enabled for optimized battery charging to activate.
And you’ll see here where they actually show you how to go to settings, privacy, location services, and turn that on, as well as significant locations here under step three. So those things have to be on that to work. So, keep that in mind.
Consider disabling a Few:
Back within system services, if we scroll down, you’ll see it has product improvement. Now we have these disabled right now, but you may want to consider leaving some of these on. The reason for this is that it says to allow Apple to use your frequent location information to improve maps. For example, maybe you’re using Apple Maps to travel, and along your route, it finds that there’s a very heavy traffic area. This is how it’s getting that information anonymously. So maybe you have routing or routing and traffic turned on. Then it sort of anonymously sends that information to Apple. They know that it’s busy in a specific area on a highway, and it lets you know in Apple Maps.
That’s how that works. So if you benefit from that, you may want to keep that on. If you don’t, turn it off, and it won’t be seen. All of the other things here could be very helpful. So we wouldn’t necessarily recommend turning everything off. For example, Find iPhone. You would want this enabled to find your iPhone using Find My. So, just take a look at each one of these. They’re pretty straightforward, but we typically leave most of these enabled. And on the location services page, you may want to customise this on a per-app basis.
Typically, we have these set up while using. For example, the wallet, it may want to know the location, so we could pay a vendor. That’s pretty typical. So, we have it while using. Certain applications we don’t need. Other applications, it’s fine again while we’re using it. But other than that, we don’t really need it to use our location all the time. So it says that while using and more for Apple Maps, it needs to use that location to help give us that navigation information. So again, customise it on a per-app basis.
Security Port:
Again, if we go back into privacy and security, this time scroll down to the bottom, and you’ll see an option here for wired accessories. This is something we would customize based on the overall use case. For example, currently it’s set to automatically allow when unlocked. This allows things plugged into the USBC port, such as a Mac, to automatically connect as long as it’s unlocked. That’s typically okay because we’re usually at home.
And if we unlock this, it’s going to be us and no one else. However, if you’re concerned with this, you can have it set to always ask. So, if we go ahead and plug in our Mac here that’s connected to the other end of this USBC cable, it will then prompt us to connect. It says, “Allow accessory to connect. Do you want to connect the USB accessory to this iPhone?” and it will only allow it to connect if you tap allow. So, it will do that on a per-device basis; we can trust it, put in our passcode, and it will never prompt us again.
This is a must:
It says, “A delay will be required when you are not at a familiar location, such as your home or work, to change security settings.” If you have this enabled, you can have it set to always, but if you try to turn this off and you’re not at home, your work, or something familiar, it will then make you wait an hour to change the passcode. This should give you enough time to maybe get to another computer, a service center, or something to either recover your device or lock it down even further.
So, this is something we would highly recommend enabling. If you go to turn it off, we can turn it off. It asks for Face ID, then it’s off. But if we have it set to always, it will give us a security delay. So, if we do this, you’ll see that a delay will always be required to change security settings. If we turn it off now, it will then delay it. And it says a security delay is required to change stolen device protection. So, you can start it or learn more. So, they’ll still have to take at least an hour to do that.
Another thing we would recommend enabling has to do with locking down your data even further. If we go into settings, tap on your name at the top. This time, if you use iCloud, go into iCloud and scroll down a little bit to the bottom. You’ll see advanced data protection. This is something we would recommend enabling as long as you have your private security key and you can remember it. For example, it says iCloud encrypts your data to keep it secure. Advanced data protection uses end-to-end encryption to ensure that the iCloud data types listed here can only be decrypted on your trusted devices, protecting your information even in the case of a data breach in the cloud.
This means Apple and no one else has the advanced keys for this. So, you’ll see here if we scroll down, you can recover your account, but you’ll need your recovery key in order to actually unlock this. So, if you can manage that key, keep it handy. Print it off, put it in a safe, then you’re good to go. If you don’t have access to this, well, then we wouldn’t recommend enabling it, but it definitely is helpful and encrypts all the information here, such as messages, iCloud Drive, notes, photos, and more.
For the most Exreme Security:
Now, for the most extreme and advanced security, there’s one other setting we would recommend. Scroll down again to privacy and security. This time, all the way to the bottom, and you’ll see lockdown mode. If we go into lockdown mode, it says, “Turn on this extreme protection if you believe you’re being targeted in a cyber attack. App, website, and features functionality will be limited, and some experiences may be completely unavailable. So, this is only an extreme measure if maybe you’re having an issue here. You can learn more about it on support.apple.com, and it talks about exactly what it does.
It locks everything down, Apple services, and much more. Then you can turn it on and then turn it off as needed. So you can exclude apps or websites from lockdown mode as well. So if you need the most extreme protection, you can enable it, read all about it here, and then configure it on a per-app basis depending on your needs. So this is only for someone who may be highly targeted, or who just needs to have this locked down for a little bit while you change some other information.
Secure your iPhone remotely:
Now, someone takes your phone, there’s a way to actually remotely erase this if you need to do that. As long as you have access to Find My, you can typically access this on a website, or you can access it on one of your devices. So, if you know your iCloud login, you can get access to that. But again, if we go over to Find My. So, we’re in Find My. We’ve tapped on our device here. You’ll see we have our iPhone Air selected that we have right here. And there are a couple of different options. Now, if you just left it behind somewhere and you’re trying to locate it, we actually had to use lost mode once, which we have here because we left our iPad on an airplane once. We were able to recover it thanks to this feature. It says to enable additional protection.
So if we go into this, you’ll see here it says lost mode. You can lock it as soon as this device is online. Lost mode will lock down certain features. It protects payment cards and shows contact info so someone can return it to you. So that’s one way to recover it. However, if you’ve lost it completely, you can erase it. So down at the bottom, it says settings and erase. So again, if we tap on this a couple of times, it says erase iPhone. All content and settings will be erased when this iPhone connects to the internet. If Find Network is enabled, you will still be able to locate this iPhone. So, even after you erase it, if you’re using Find My, you can still locate it. So, if you’re concerned about your information getting out there, this is a great way to lock it down just to make sure no one can access your information.
See what iPhone is doing:
Now, finally, there are a couple more things you may want to consider if you want to keep an eye on what’s going on on your iPhone. Again, go into settings. Scroll down to privacy and security. And then again, down at the bottom, you have a couple of different things here under transparency logs. App privacy report and Apple intelligence report. Now, some people have suggested that this takes up a lot of power. Typically, the logs are just there. It’s just saving them. So, if you turn on app privacy report, it says it records data and sensor access, app and website network activity, and the most frequently contacted domains. It will then create a report for you and let you know exactly what’s going on on your phone with applications. The same is true with Apple intelligence.
If we enable this, you’ll see it says export duration. We can turn it on for 7 days. And it says this report is stored on the device and may include personal data such as messages and text you enter in intelligent writing tools. So if you’re using Apple intelligence, it’s all on the device, but you can access it here and see exactly what Apple intelligence is doing. So, if you want more information about that, we would recommend enabling it and seeing what you find.
How do you configure your iPhone?
So, those are 15 important security settings to help you lock down your iPhone, make it more private, and customise the overall security based on your own use case. We’d love to hear from you about how you use it. If you actually customise the location settings or anything else, you can change some of those to help with battery overall as well, but they will reduce some overall functionality. But again, let us know how you’ve customised yours.
Conclusion:
And of course, as always, thanks for watching. I’ll see you next time.